Easify V4 is no longer supported and has been superseded by Easify V5.
Finance - Creating A Payment Plan
- Part 1: Start a simple Payment Plan
- Part 2: Set Instalments manually
- Part 3: Set Instalments automatically
- Part 4: Dealing with VAT rounding
Part 1: Start a simple Payment Plan
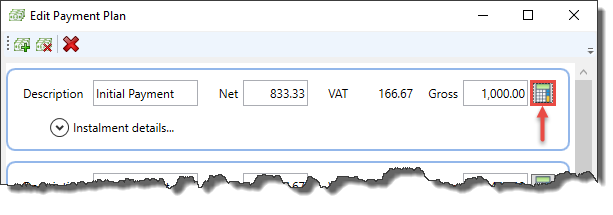
1.1 Open an existing order and then click on the Payment Plan button, located along the top menu bar

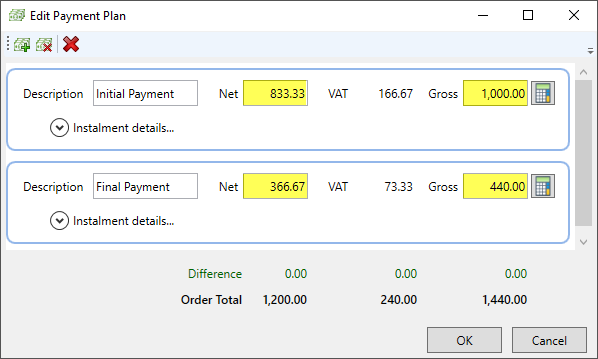
A new Payment Plan window opens:
Each section surrounded by a blue outline represents a single instalment.

The default number of instalments is 2. You can add more instalments by clicking on the
 button in the top menu bar but for the purposes of this example we will keep it simple and use the default 2 instalments.
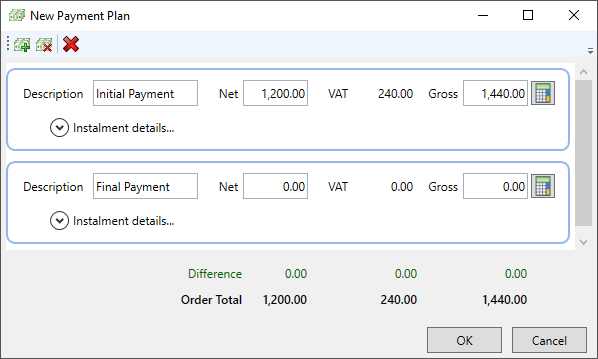
1.2 Set the amount payable for each instalment
The aim here is to split the order total in to separate instalments.
Instalment amounts can be set manually or automatically (these options are covered in Parts 2 and 3 further down the page). For now, we will enter 1,000.00 as the value for the first instalment and 440.00 as the value for the second instalment. Click or Tab to another area on this window to update the displayed figures.
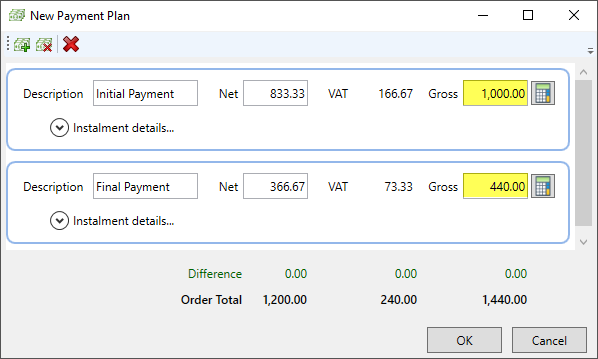
The sum of these 2 amounts is equal to the total amount on our order.
The customer can now pay for their order in 2 instalments and can be invoiced individually for each instalment. This is covered in our Using a Payment Plan guide.
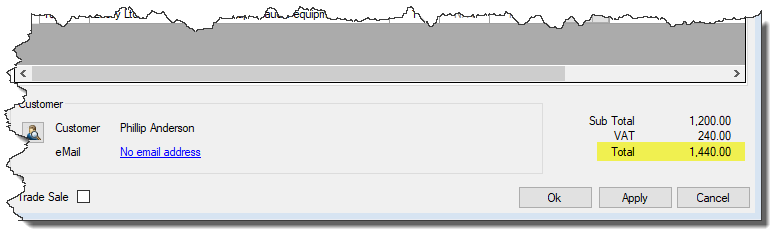
1.3 Click OK on the Payment Plan window
1.4 Click the Apply button on the Order Details window

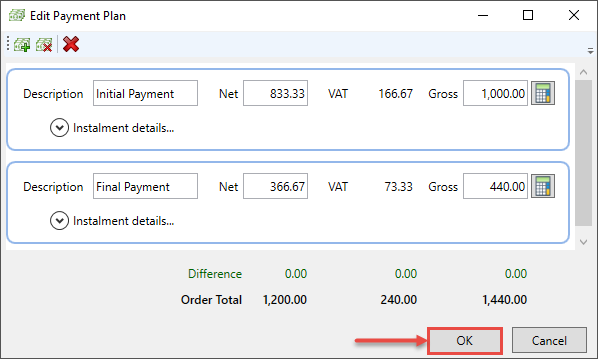
Now you are able to view the Payment Plan information you have saved on an order by clicking on the Payment Plan button on the Order Details window. You can also access this from the Billing tab on an order.
Part 2: Set Instalments manually
In Part 1 we manually entered the amounts for each of the 2 instalments:
You can enter an amount in either the "Net" or "Gross" fields on each instalment (highlighted below). Entering an amount in to the "Net" field will cause the figure in the "Gross" field to adjust accordingly, and vice versa.
Part 3: Set Instalments automatically
A "calculator" button is located on each instalment on a Payment Plan:
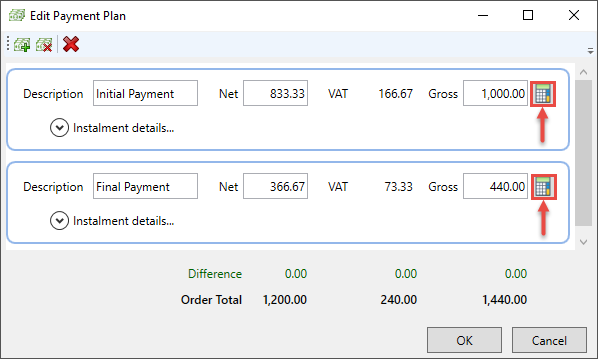
Clicking on this button displays the following pop-up:
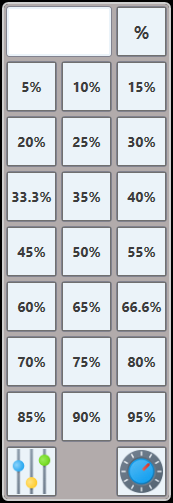
Here you can choose a percentage for each instalment and let Easify do the maths for you.
As an example, say we want to set 2 equal instalments (i.e so that each instalment equals 50% of the order total), if we re-open the customer order from Part 1 of this guide then we can do the following:
3.1 Open the order and then click on the Payment Plan button
3.2 Click the Calculator button on the first instalment
3.3 Set the first instalment to 50%
You can manually enter 50 at the top of the calculator button and click the "%" button…
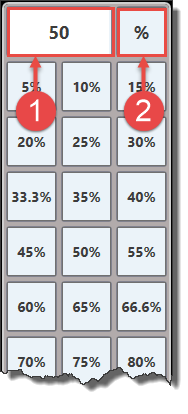
Or click on one of the handy, pre-configured buttons…
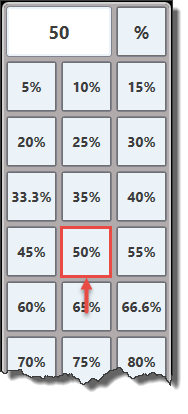
3.4 Click the Calculator button on the second instalment
3.5 Set the second instalment to 50%
As in step 3.3, you can manually enter 50 at the top of the calculator button and click the "%" button, or click on the "50%" button instead.
The system has now automatically set each instalment amount to £720.00 (50% of the order total):
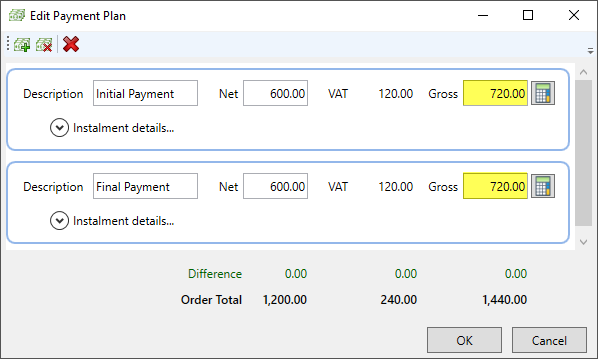
3.6 Click OK on the Payment Plan window
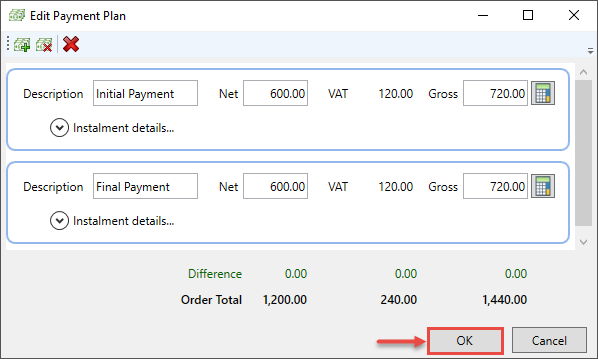
3.7 Click the Apply button on the Order Details window to save the changes
Part 4: Dealing with VAT rounding
You may have noticed that so far we have dealt with straightforward examples where instalments could either be split neatly in to 2 payments, or entered manually. However, there will be times where the order total can't be split in to equal instalment amounts.
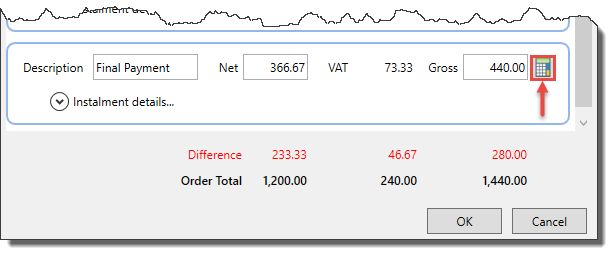
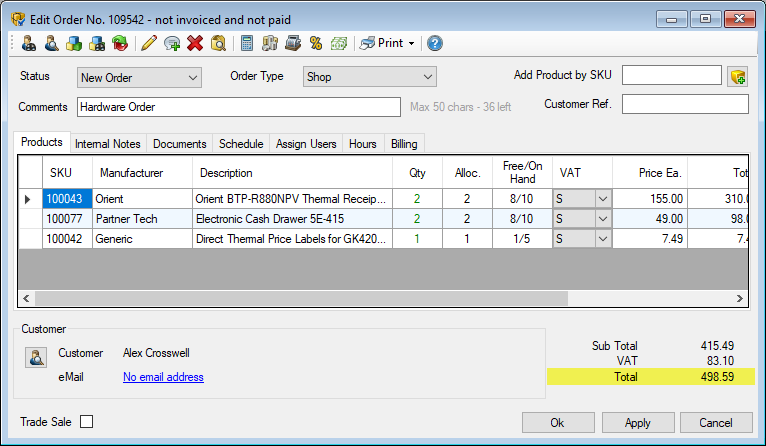
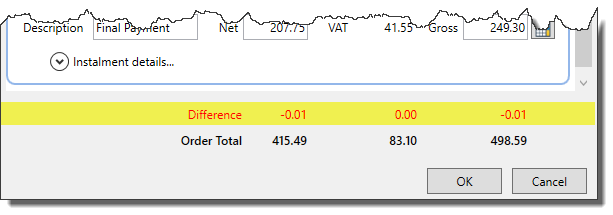
On the following order, the total payable is £498.59:
On the Payment Plan for this order, the Calculator has been used to set each instalment amount to 50% of the order total.
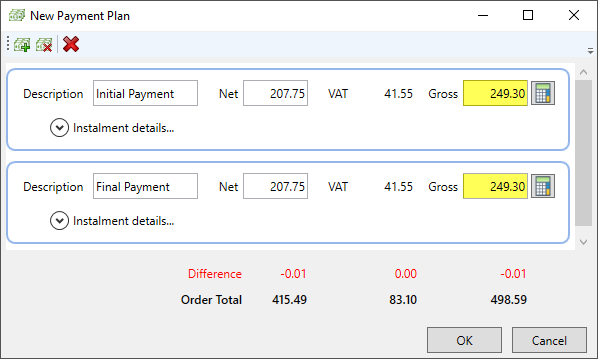
As the order total can't be divided equally in to 2 parts, the system rounds up and alerts you to this by displaying the remainder (the "Difference") at the bottom of the window:
There are 2 methods of dealing with the difference.
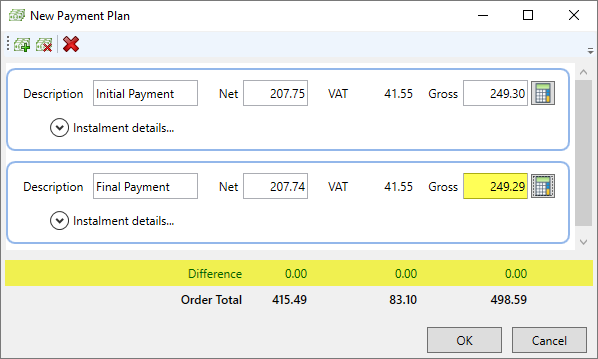
Method 1: Adjust one of the instalment amounts manuallyIn the screenshot below, the second instalment has been manually edited so its value is now 249.29 and the Difference row turns green and reads 0.00. N.B - remember to click or tab to another area on the windows to update all the values.
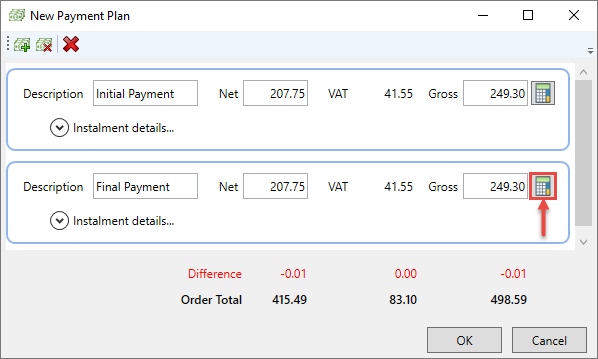
 Method 2: Use the "Vat Rounding" button on the Calculator
-
Click the "Calculator" button on the second instalment:
-
On the Calculator pop-up, click the button in the bottom right corner:
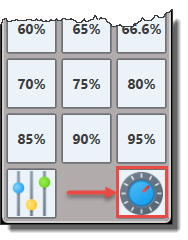 When this button is clicked, it automatically adjusts the instalments to account for the VAT rounding.
