Easify V4 is no longer supported and has been superseded by Easify V5.

Installing Generic EPOS Hardware
Contents...
- Installing a Generic Thermal Receipt Printer
- Installing a Generic Pole Display
- Connecting an Electronic Cash Drawer
- Installing a Generic Label Printer
- Connecting a Generic Barcode Scanner
Installing a Generic Thermal Receipt Printer
The receipt printer connects to your EPOS PC via USB. We recommend the use of the generic text only printer drivers that are built into Microsoft Windows.
The following procedure is illustrated using Windows XP Professional however it will apply to later versions of Microsoft Windows too...
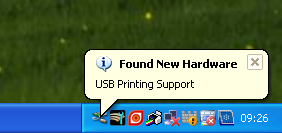
Plug the receipt printer into a free USB port on your PC, and switch it on. Windows will detect the printer and install USB printing support.
Open the Printers and Faxes folder on your computer. This can be accessed via the start menu, or the control panel depending on how you have configured Windows. Select Add a printer.

In the Add Printer Wizard click Next.

When prompted to select Local or Network printer, select Local printer attached to this computer, and de-select Automatically detect and install my Plug and Play printer. Then click Next.


When asked to Select a Printer Port, choose the virtual printer port for USB that has the highest number. In this case the highest numbered virtual printer port is USB002. Then click Next.
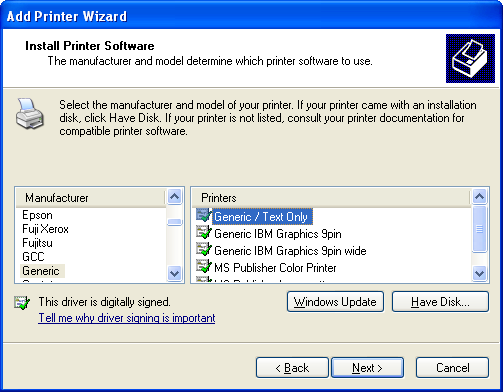
In the Install Printer Software dialogue, select the Generic manufacturer and then the Generic / Text Only printer. Click Next.

When asked to Name Your Printer, we recommend you keep the default name of Generic / Text Only. But you can change this to something more meaningful if you wish. Click Next.

In the Printer Sharing dialogue, choose Do not share this printer. Click Next.

And finally when asked whether to print a test page choose No. Click Next and then in the final page of the wizard click Finish to complete the installation of your printer.

Next you will need to enable the receipt printer in Easify > Tools > Options > EPOS. Simply tick the box Enable Receipt Printer and select your newly installed printer (Generic / Text Only) from the drop down list of printers.
You will need to customise the header and footer text that prints on receipts by clicking the Receipt Text button.
Test that your printer has been installed correctly by launching Easify in demo mode and running a sale through the POS. If the receipt printer fails to print you may need to change its virtual printer port. To change the virtual port of your printer, open the Printers and Faxes folder, right click the printer and select Properties.

On the Ports tab, select a different Virtual printer port for USB and click Ok.
Installing a Generic Pole Display
Easify was designed to communicate with pole displays by means of RS232 (Serial) communications.
If your pole display connects to your EPOS PC via a serial connection (usually a 9 pin D-Sub connector on the rear of your PC) then you can simply enable the pole display in Easify > Tools > Options > EPOS, and set the appropriate Com Port number in Easify. The Com Port number will vary from computer to computer but is typically 1, 2 or 3. You may need to experiment with different port numbers in Easify > Tools > Options > EPOS until you find the correct port number.

Newer pole displays connect via USB and use a special serial to USB device driver to communicate.
You can download the serial to USB device driver here. This USB driver will work with Windows XP, 2000, and Vista.
To install the USB pole driver...
- Extract the files to a folder on your PC.
- Plug the Pole Display in and Windows should bring up the Add New Hardware Wizard.
- Select "No, not at this time" Click Next
- Select "Install from a list or specific location (Advanced)" Click Next
- Make sure the Include this location in the search is checked and click the Browse button and browse to the folder where you extracted the USB driver. Make sure you select the correct folder for you OS. Once the folder is selected Click OK and then click Next on the Wizard screen.
- Select the Wasp USB to UART and Click Next.
- If you get a Warning about the Windows Logo Click Continue Anyway.
- The driver should be install and you can click Finish.
You can look in your Windows Device Manager to see the COM port number the driver has installed...

...and set this as the Com Port number in Easify > Tools > Options > EPOS.
Connecting an Electronic Cash Drawer
The electronic cash drawer connects to your receipt printer, and is triggered to open by commands that Easify sends to the printer when a receipt is printed.
Simply take the lead from the electronic cash drawer and plug it into the socket on the rear of your receipt printer.
In Easify > Tools > Options > EPOS you will need to set the correct till open command in order for the drawer to be kicked open after a receipt prints. For printers and cash drawers supplied by us the correct code is 27,112,0,25,30,27,116,2.
Installing a Generic Label Printer
Label printers typically connect to your PC via USB, and can be attached to any computer running Easify, it does not need to be physically connected to the EPOS PC.
Before you connect your label printer, download and install the label printer driver. You can download the label printer driver here.
With the label printer installed, go to Easify > Tools > Options > EPOS and select the label printer in the Label Printer drop down list near the bottom of the page.
Note: You should leave the Barcode Font Name set to its default values unless instructed to change it by Easify support.
Connecting a Generic Barcode Scanner
These days most barcode scanners connect via USB. To connect a USB barcode scanner to your Easify EPOS PC, simply plug it in. Windows will detect your scanner and install the correct Windows drivers for it.
Older barcode scanners are of the "Keyboard Wedge" type, and typically connect inline with your PS2 or AT keyboard. Easify is fully compatible with older "Wedge" type barcode scanners as long as they are capable of sending characters to the keyboard port.
About Easify
Easify is a software package for Windows that helps you to run your small business.
It includes all the tools you need to run your small business - everything from EPOS and stock control to invoicing and VAT returns.
Click here for an overview of Easify.
