Setting up multiple Easify computers
Easify can be installed on multiple computers that all work off of the same local Easify database.
We have a YouTube video that explains how to set this up.
Scroll to time index 29:31 for the start of the "Installing an additional client" tutorial:
Alternatively... here's a bunch of screenshots that explain the same process.
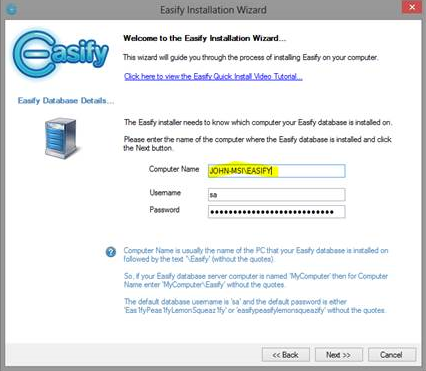
First we need to know the name of your Easify database computer, found in the bottom left of the main Easify window (the first computer you installed Easify onto):

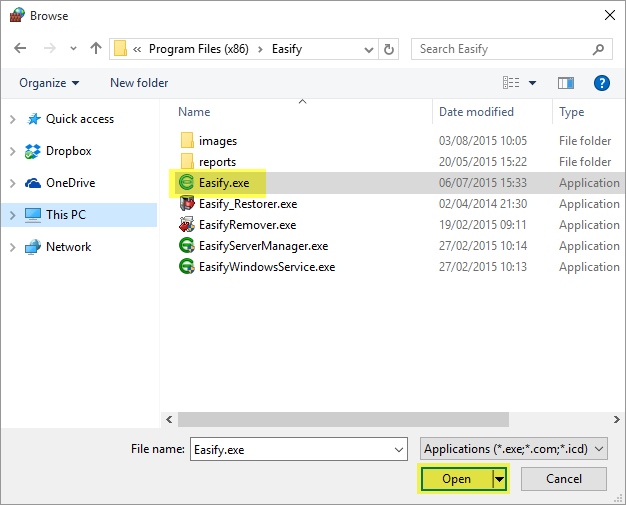
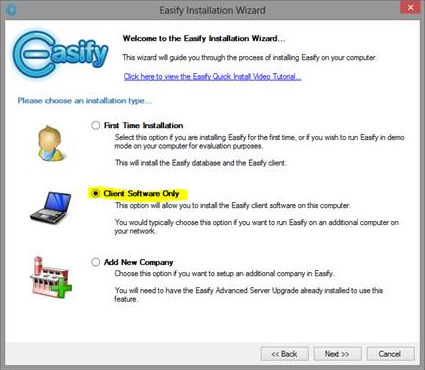
Then you need to run the Full Installer on each new Easify client computer, selecting the Client Software Only option:
On the next screen just insert the computer name into the Computer Name box and click next:
If all is well the client software should install successfully and you’re away.
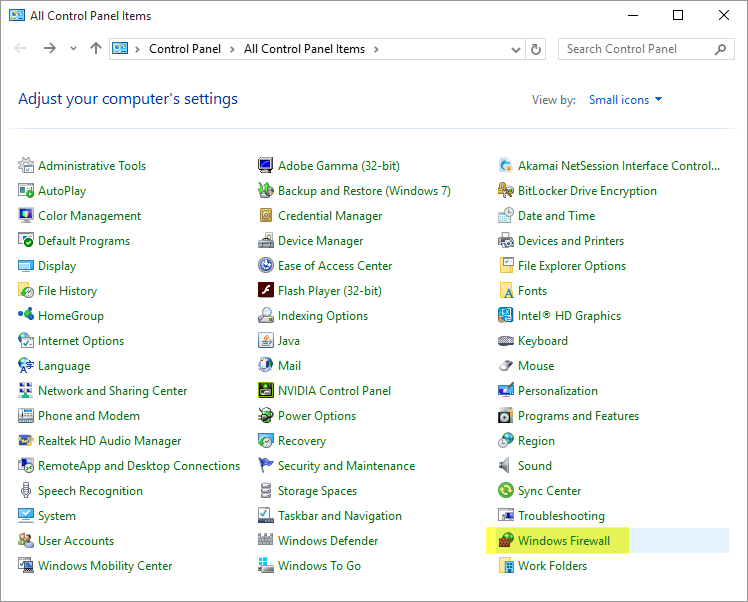
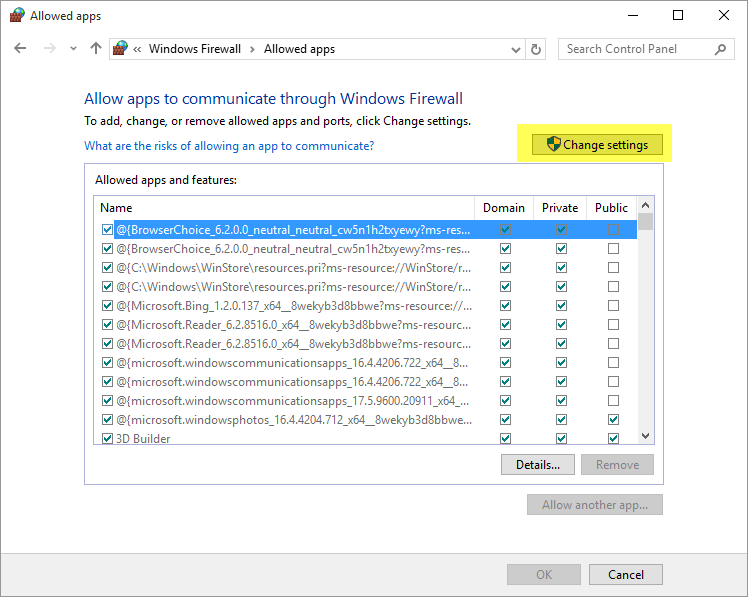
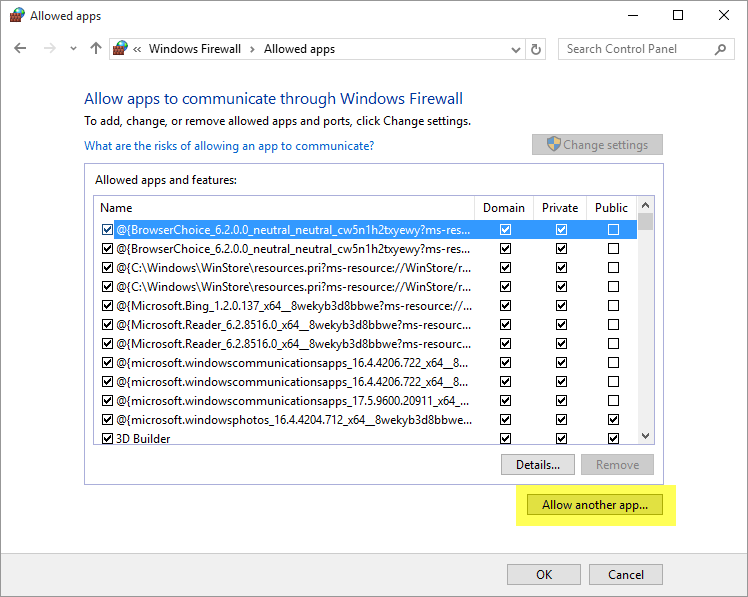
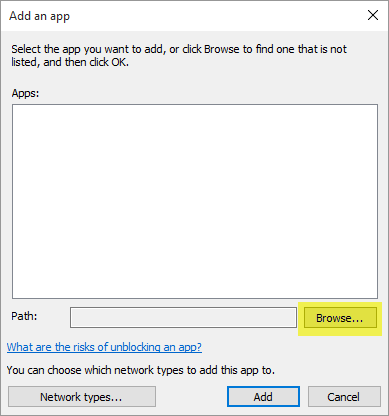
If not, one of your computers may require a reboot; you may have gotten the computer name wrong; there may be a problem with the network between the computers. At this point you should check that all network cables are plugged in correctly, your wireless signal is sufficiently strong and your router is operating correctly. It might also be that your firewall software (can be part of your Antivirus Software / Security Suite) on either computer is blocking the connection. As a test you might temporarily disable your firewall software and see if the connection is then allowed. If it is, you will need to configure your firewall to allow this connection at all times. Here is an article we have written to help with this process.
Please remember that Easify Support Engineers are available to give advice should you run into trouble installing Easify.
Happy to help - John (Easify Support)