Getting Started with the Easify WooCommerce Plugin
Introduction
The Easify WooCommerce plugin allows you to connect Easify to your WordPress website.
You can then publish the products that you have in Easify to your website along with rich HTML descriptions and multiple product images.
When your customers place orders on your website, those orders are automatically sent to Easify in near real-time along with their payment details allowing you to easily process your orders in a central location, and to greatly automate your bookkeeping and accounting.
Click here for a brief example of Easify working with WooCommerce...What you will need
To connect Easify to your WooCommerce WordPress website you will need the following:
- An Easify Cloud Server subscription and at least one Easify User Subscription.
- An Easify WooCommerce plugin subscription.
- A WordPress website with the WooCommerce plugin installed.
The Easify subscriptions can either be subscriptions that you are currently paying for, or if you are new to Easify we offer a 30 day free trial of the Easify Cloud Server, User Subscriptions and the Easify WooCommerce plugin subscription.
Your website should be running the latest version of WordPress and PHP 8.x. You might also need to make sure the necessary ports are open for your website to communicate with Easify, we can provide more information on this as required as it varies between providers.
If you need good quality WordPress web hosting with excellent support that is 100% compatible with Easify we can provide this too. For 24 month pre-paid hosting we will even build you a basic eCommerce enabled website. Click here for more details...
Any questions? Feel free to email support@easify.co.uk.
Setting up Easify
First we will look at how you setup Easify to be able to communicate with your website.
This involves adding a new ECommerce channel using the ECommerce Channel Manager.
Refer to the following guide ECommerce Channel Manager which will show you how to add a new ECommerce Channel to Easify.
Setting up your website
Installing the Easify WooCommerce Plugin
Now we will look at what you need to do to prepare your website to communicate with Easify.
Assuming that your WordPress website is already up and running, you will need to install WooCommerce. We won't discuss how to do that here as there are many tutorials on this online and on YouTube.
Next you will need to install the Easify Server WooCommerce plugin. To do this go to the Add New Plugin page in WordPress and search for Easify.
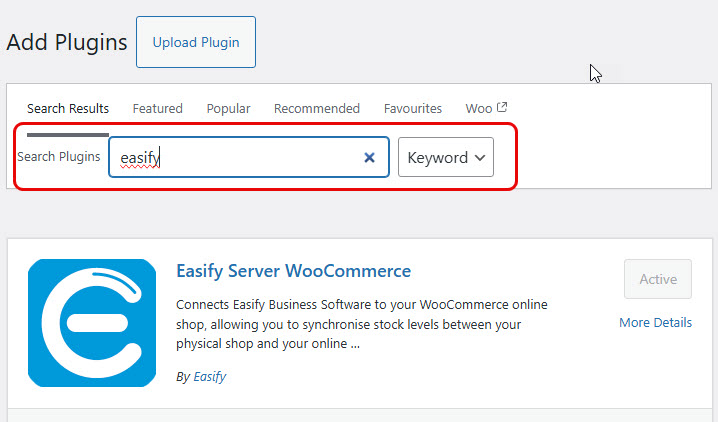
Install and activate the Easify Server WooCommerce plugin.
To configure the plugin in WordPress go to Settings -> Easify Settings.
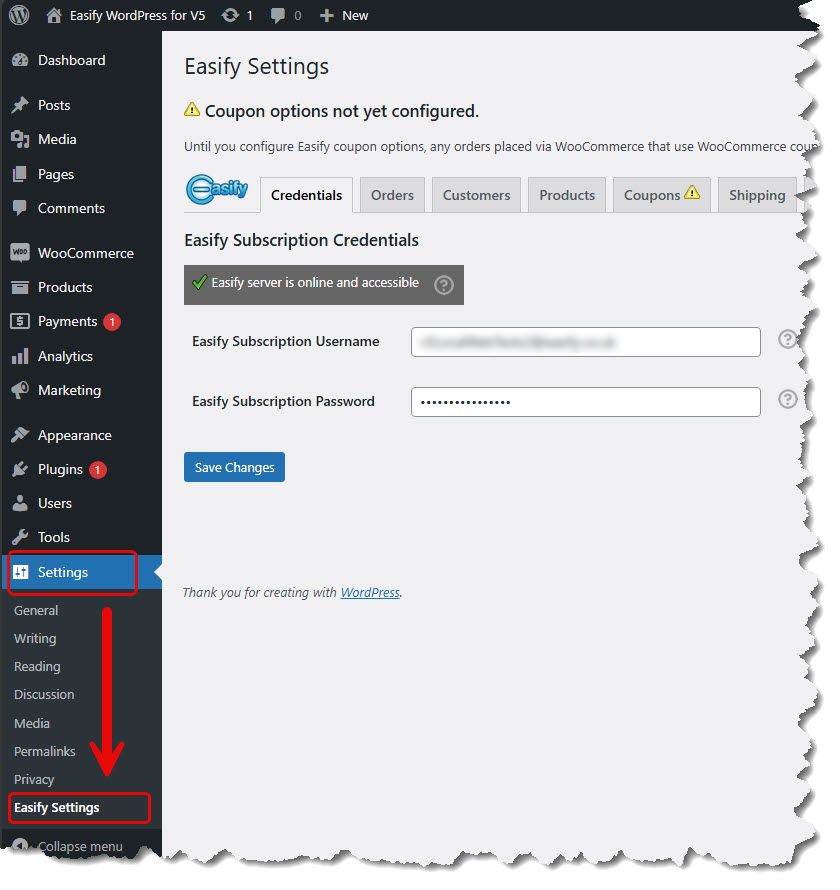
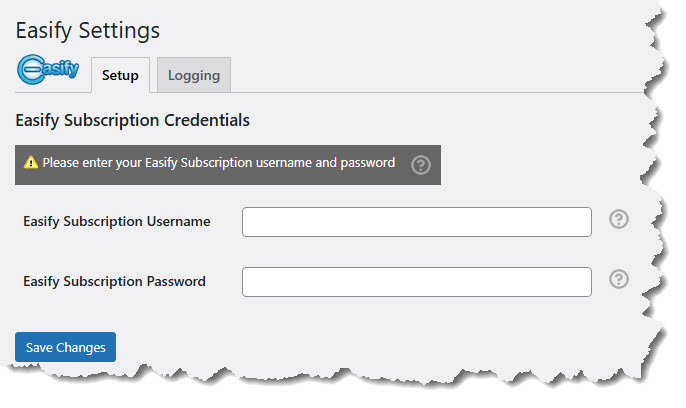
Initially you will see a limited number of tab pages and you will be asked for the username and password for the Easify WooCommerce plugin subscription.
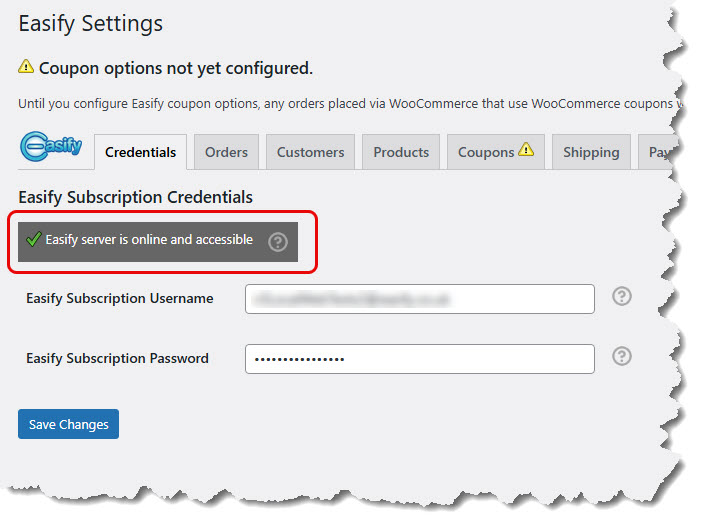
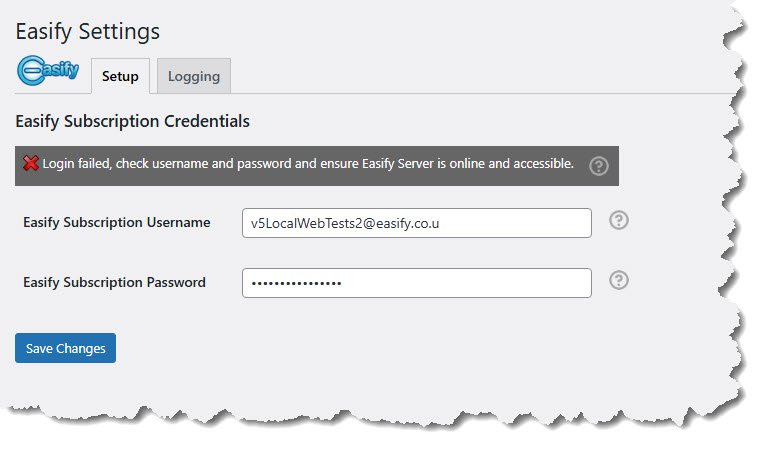
Enter the username and password that we sent you for the Easify WooCommerce plugin. If successful you will see a green tick as shown below and all of the settings tabs will become visible.
If you get a red cross and an error on entering the username and password as shown below, refer to the Easify WooCommerce Plugin Troubleshooting guide .
If you are sure that the username and password are correct, the problem is usually that the relevant TCP port is not open on the firewall of your web server. If you use us for your web hosting this will not be a problem but if you use a 3rd party web host then you will need to ask them to open the relevant port. Click here to learn more about web server firewall ports.
Setting up Orders
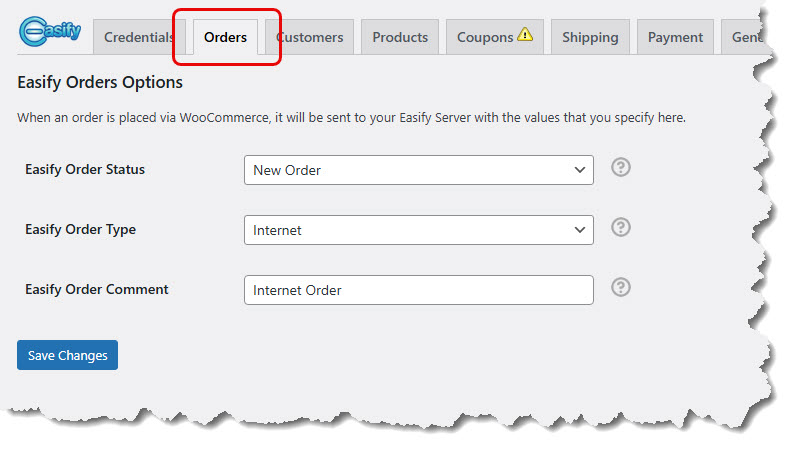
For most scenarios you can leave the Orders settings at their default values.
If you want to customise these settings click here to learn more about the options on the Orders page.
Further Viewing
We have a video tutorial that shows how to setup Easify and WordPress which will walk you through the setup process.
Please note that the video was published for Easify Version 4.x and some of the information is out of date however the basic principles remain the same for later versions of Easify.
Useful Links
Easify Server WooCommerce Plugin Subscription
Download the Easify Server WooCommerce plugin from WordPress
