Easify V4 is no longer supported and has been superseded by Easify V5.
Product Image Editor
With Easify you can add as many images to your products as you like.
The images can be automatically uploaded to the products on your eCommerce website, if you have one, or simply added to your products in Easify for easy reference, or to print out onto information sheets for your customers.
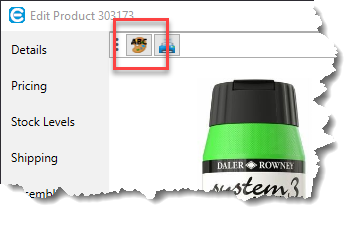
You can launch the Product Image Editor by clicking the Edit Info button on the Info tab of the Product Window.
Overview
The Product Image Editor is divided into 4 main areas or panels:
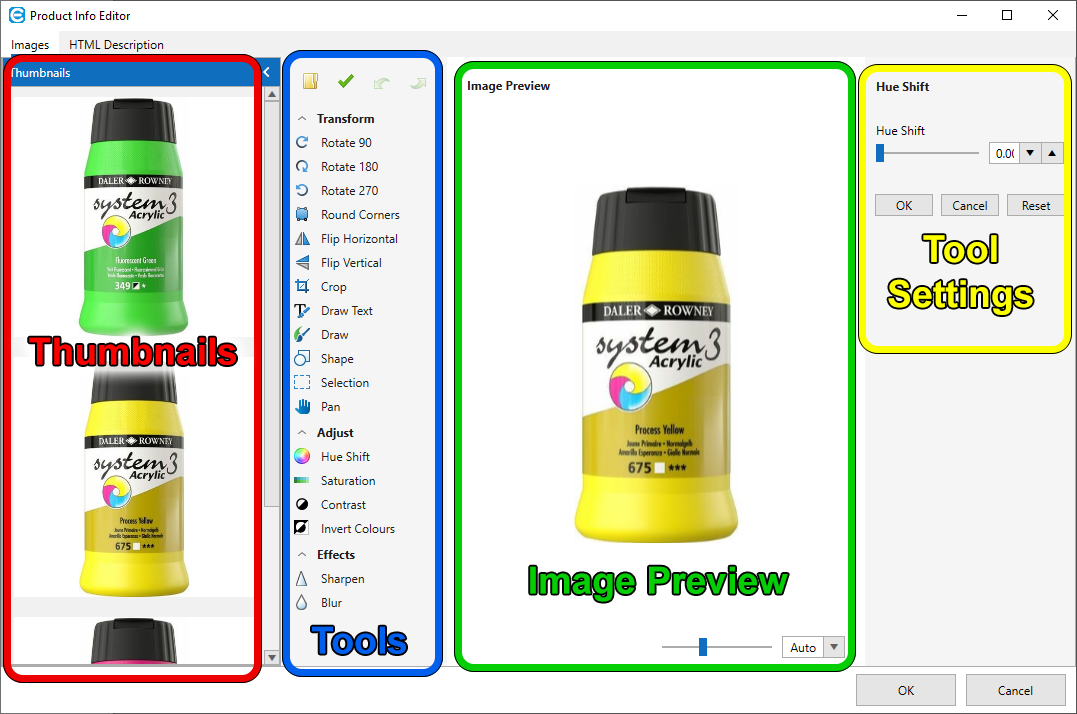
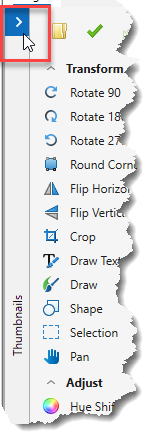
Thumbnails
The Thumbnails panel shows a thumbnail of each image that is currently associated with the product, and allows you to select an image to be edited.
Here you can also delete an image from the product and also change the order in which the images appear.
Tools
The Tools panel contains the various image editing tools that you can use to edit the image with, and also buttons that allow you to add a new image from disk, apply changes to an image, and to undo/redo your changes.
Image Preview
The Image Preview shows a preview of the image that is currently being edited.
Tool Settings
The Tool Settings panel displays the settings that are related to the currently active editing tool.
Thumbnails
When images have been added to a product they will appear in the Thumbnails panel.
Hovering over a thumbnail with the mouse pointer will bring up buttons that can be used to manipulate the image.
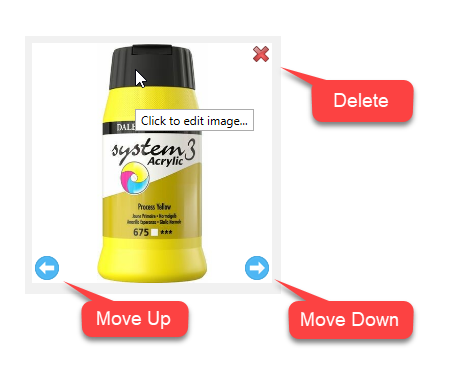
Click the Delete button to delete the image.
The Move Up and Move Down buttons can be clicked to change the order in which the images appear. Moving the image down moves it further down the collection of images, moving the image up moves it nearer to the top of the collection of images.
Left clicking a thumbnail loads it into the Image Editor section so that it can be edited.
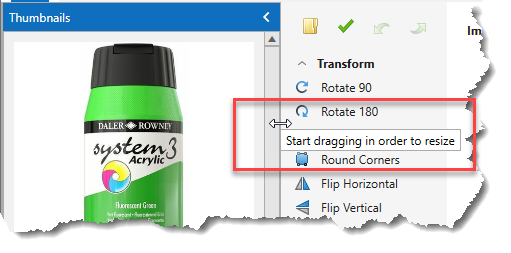
To create more space on the screen for image editing you can collapse the thumbnails panel by clicking the button in the top right corner.
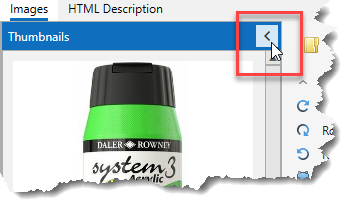
To restore the thumbnails panel to its original size, click the button again.
You can also resize the width of the thumbnails panel by dragging the right hand side of it with the mouse.
Tools
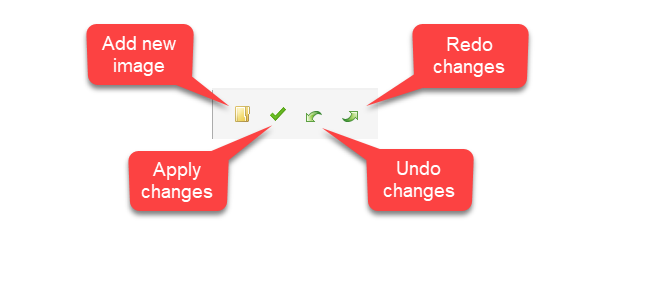
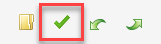
The top section of the Tools section contains buttons that allow you to add a new product image from disk, to apply changes to an edited image, and to undo/redo changes to the image currently being edited.
Adding a New Image
To add a new image to the product click the Add Image button.
This will open a dialoge that allows you to browse for an image to add.
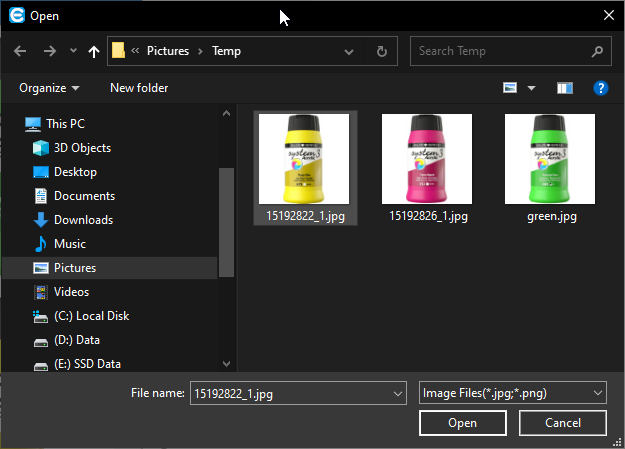
By default only .jpg and .png files will be shown, however you can choose to view all file types if you desire.
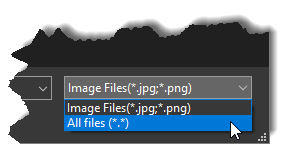
Note that it is possible to load images in a variety of file formats, however images are always saved to your Easify Server as .jpg files. Easify will also re-size and compress your images according to the Product Image settings in Easify Options.
Applying Changes to an Image
After you have finished editing an image you will need to apply your changes. To do this click the Apply Changes button.
Undo and Redo
If you want to back out a change you made to an image being edited, click the Undo button or press Ctrl + Z on the keyboard.
Similarly you can re-instate an undone change by clicking the Redo button or pressing Ctrl+Y on your keyboard.
Rotation Tools
The first tools in the Tools panel are for rotating the selected image.
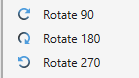
The rotation tools will immediately rotate the selected image by the specified amount e.g. 90, 180 or 270 degrees.
Round Corners Tool
The round corners tool allows you to apply rounded corners and/or a coloured border to the image.
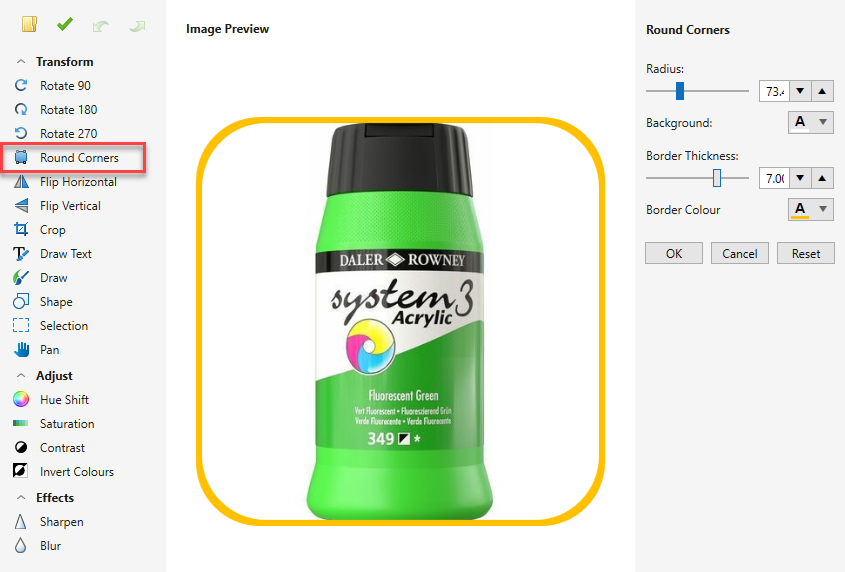
Use the Radius slider to choose how rounded you want the corners to appear.
You can choose a background colour for the outside area of the border using the Background colour picker.
The Border Thickness slider set the thickness of the border.
You can set the colour of the border using the Border Colour colour picker.
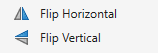
Flipping Tools
You can flip the selected image horizontally or vertically using the Flip Horizontal and Flip Vertical tools.
Crop Tool
The Crop tool enables you to zoom into a portion of the original image and to discard the remainder.
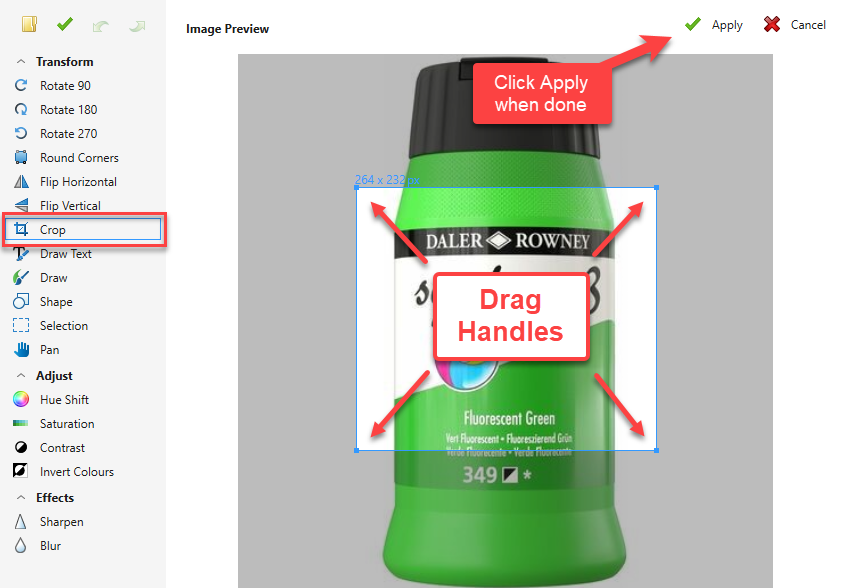
Drag the crop area handles using the mouse so that the crop box is a suitable size.
When ready, click the Apply button in the top right to apply the crop to the image preview.
The area of the image editor that was greyed out in the crop tool will be discarded.
Draw Text Tool
The Draw Text tool enables you to add text to your images.
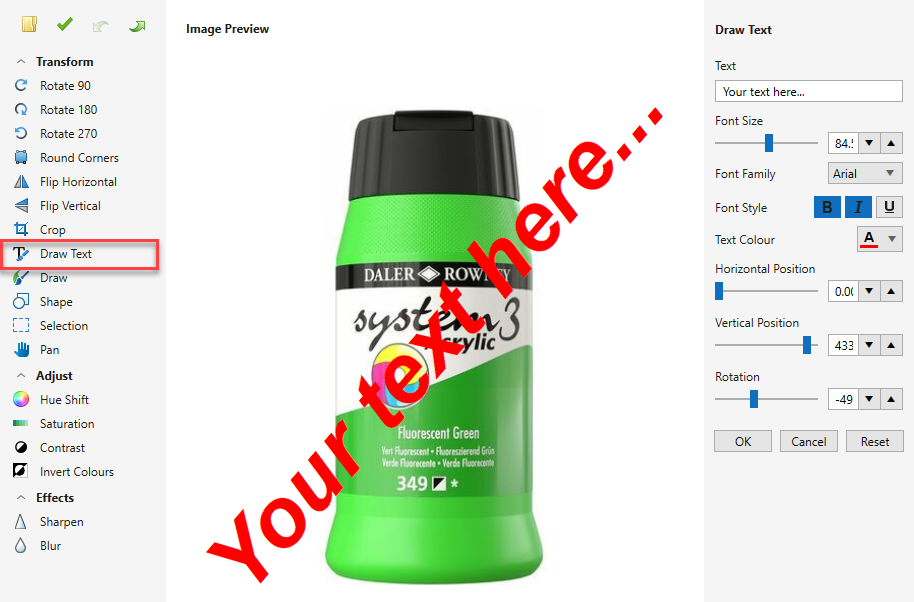
In the Draw Text tool settings you can enter the Text that you want to add to the image, and set its Font Size, Family (which font is used), the Font Style and Text Colour.
You can set the location of the text using the Horizontal Position and Vertical Position sliders, you can also re-position the text by dragging it to where you want it with the mouse.
The angle of the text can be changed using the Rotation slider.
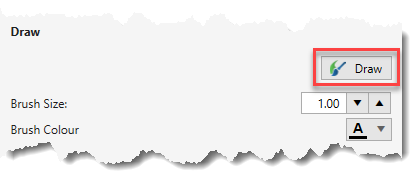
Draw Tool
The Draw tool enables you to draw lines on the product image.
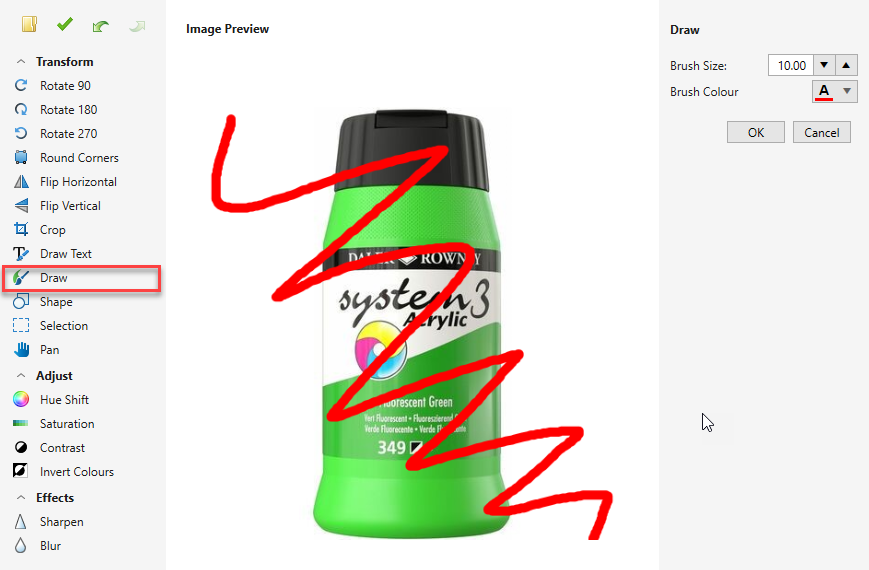
You can set the width of the line by changing the Brush Size, and choose a colour for the line using the Brush Colour picker.
To draw on the product image, hold the left mouse button and move your mouse.
TIP: If you want to draw a straight line instead of a freehand line, use the Shape tool with the shape set to Line as described below.
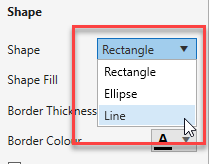
Shape Tool
The Shape tool enables you to draw shapes such as Rectangles, Squares, Circles, Ellipses and straight Lines on the product image.
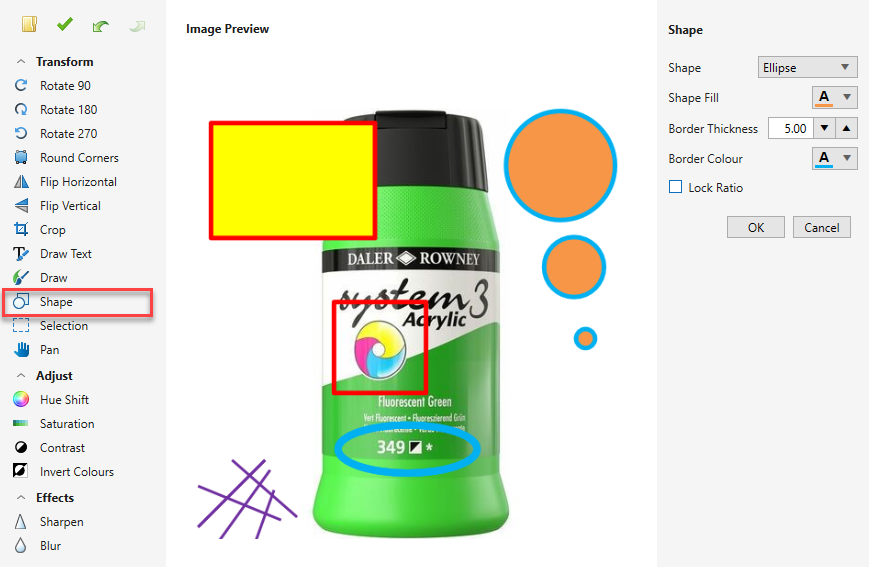
Choose the type of shape you want from the Shape drop down list:
Create the shape by holding the left mouse button and dragging the shape to the size you want on the product image.
The Shape Fill determines what colour will be used to fill the shape. If you just want the border of the shape without a fill colour, you can select Transparent for the fill colour.
The Border Thickness sets how thick the border, or edge of the shape will be.
You set the colour of the border via the Border Colour picker.
If you want to draw a square or circle, tick the Lock Ratio box. This will ensure the width and height of the shape remain the same as you drag them out. Alternatively you can hold the Ctrl key on your keyboard to lock the aspect ratio of the shape as you drag it out without having to tick the Lock Ratio tick box.
Ticking the Lock Ratio tick box or holding the Ctrl key on your keyboard while drawing a line will constrain it to be drawn at a 45 degree diagonal angle.
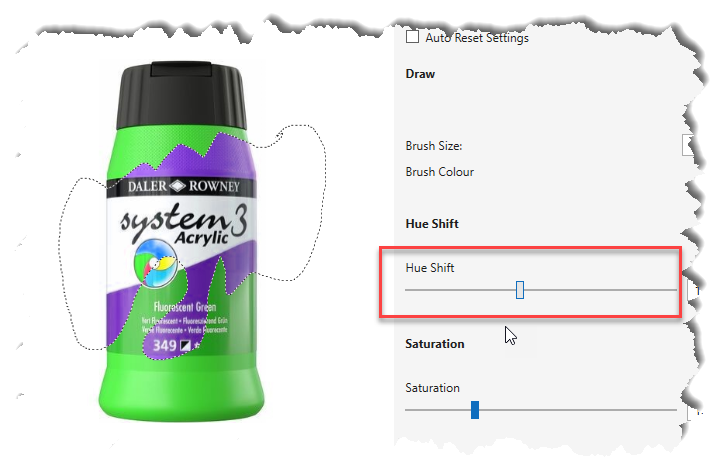
Selection Tool
The Selection tool allows you to apply many of the image editor tools constrained within an area of your choosing.
In the example below you can see that we have drawn a free form selection on the product image, and used the Hue Slider tool to change the selected areas colour to purple.
The Selection tool can be used with many of the built in image editor tools as shown below (you may need to use the side scrolling bar or expand the window to see all the tools):
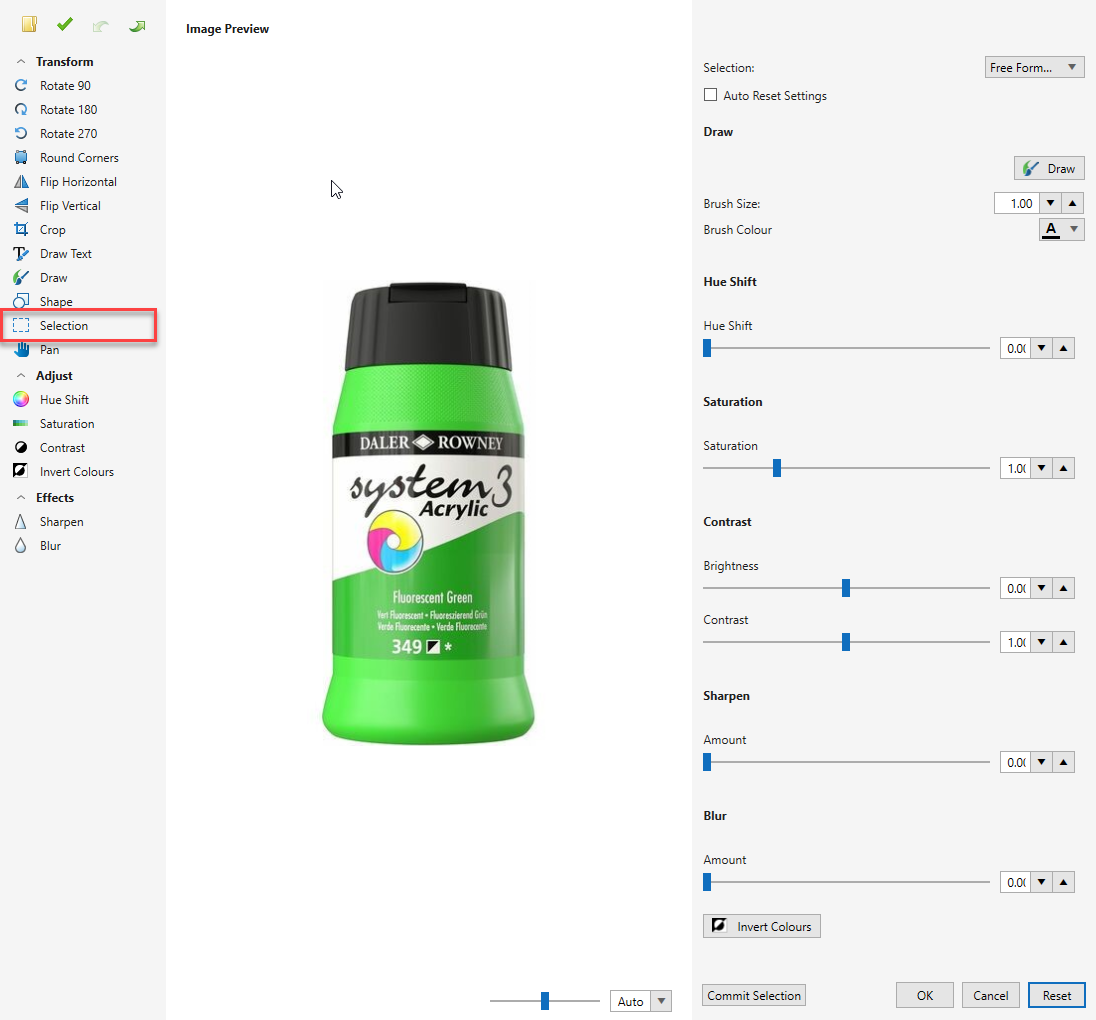
There are three selection modes, Rectangle, Ellipse and Free Form.
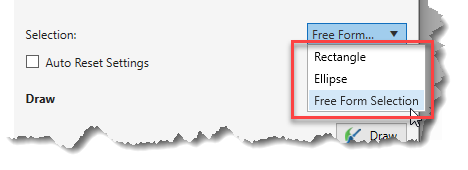
When you have selected a selection mode, you make a selection on the image by holding the left mouse button and dragging the selection as you want it.
Holding the Ctrl key on the keyboard while dragging a rectangle will constrain the selection to being square, and for an ellipse will constrain it to be a circle.
With the Free Form selection mode, the edge of the selected region will follow the mouse cursor as it is dragged around the image. The shape will automatically be closed with a straight line from the current cursor location back to the start point.
The Auto Reset Settings checkbox can be used if you want to reset the effects when a new selection is made. In other words, if you select an area and change its Hue to purple, and then select another area to change, with Auto Reset Settings ticked, the Hue will be reset after making the selection, whereas with Auto Reset Settings not ticked, the Hue will still be set to purple.
Note that if you select an area and apply an effect to it, any changes will be lost if you then select another area to edit. Be sure to Commit Selection and apply your changes before selecting another area to modify.
If you want to draw within the selected area, click the Draw toggle button. This enables you to draw with the mouse as per the Draw tool previously mentioned.
More information about the other tools available in the Selection tool can be found in the remainder of this article.
Pan Tool
The Pan tool can be used when the image preview is zoomed in, to drag the image around to allow you to view a different part of the image.
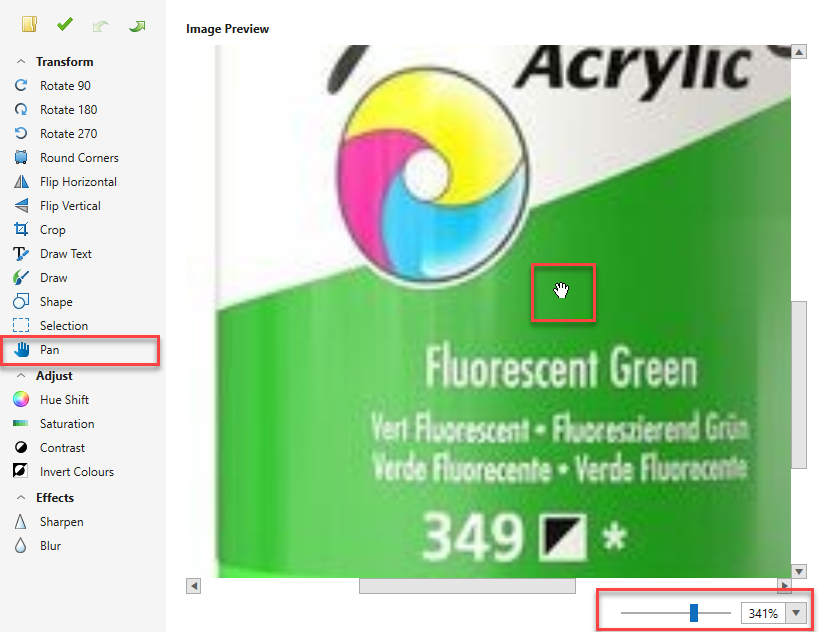
You can zoom in the image preview using the zoom tools in the lower right corner of the image preview. When zoomed, select the Pan tool and the mouse cursor will turn into a hand icon. Click and drag to move the image around.
The Pan tool does not edit the image in any way, it just allows you to move it around when zoomed in.
Hue Shift Tool
The Hue Shift tool allows you to change the colours (or hues) in the image.
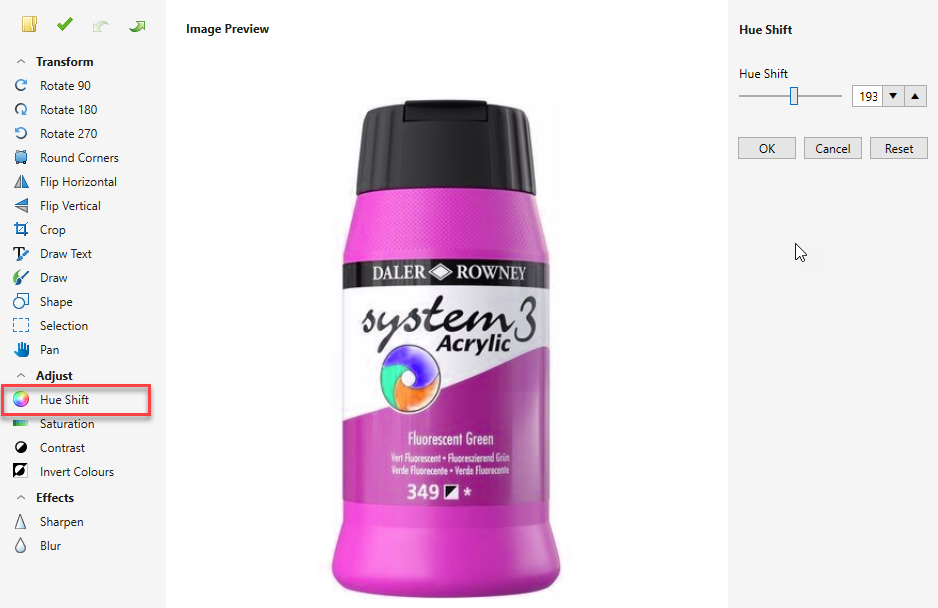
Simply drag the Hue Shift slider to obtain the desired effect.
Saturation Tool
The Saturation tool allows you to change the saturation of the image, in other words how vivid the colours in the image are.
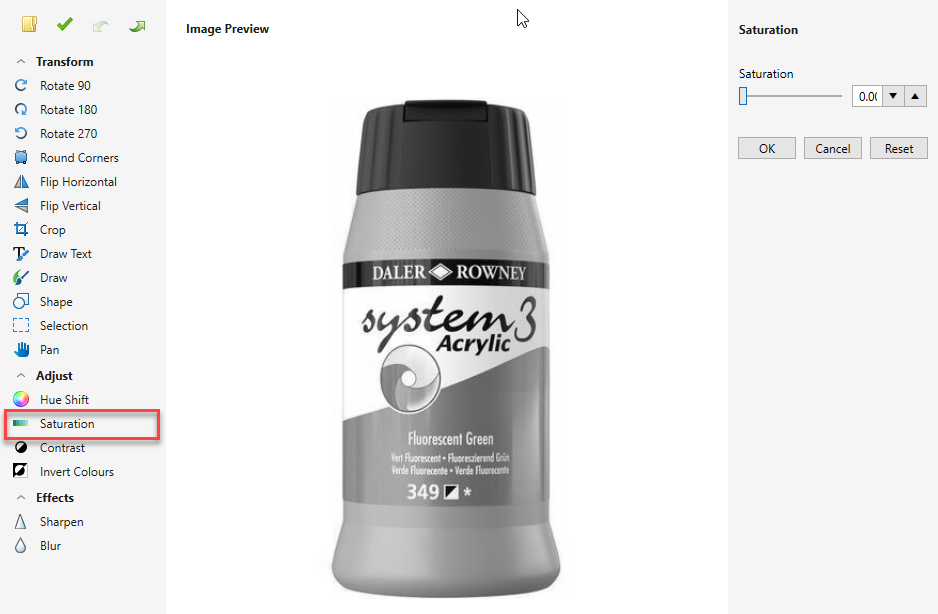
Simply drag the Saturation slider to obtain the desired effect. Lowering the saturation makes the image more black and white, increasing the saturation makes the colours more vivid.
Contrast Tool
The Contrast tool allows you to change the Brightness and Contrast of the image.
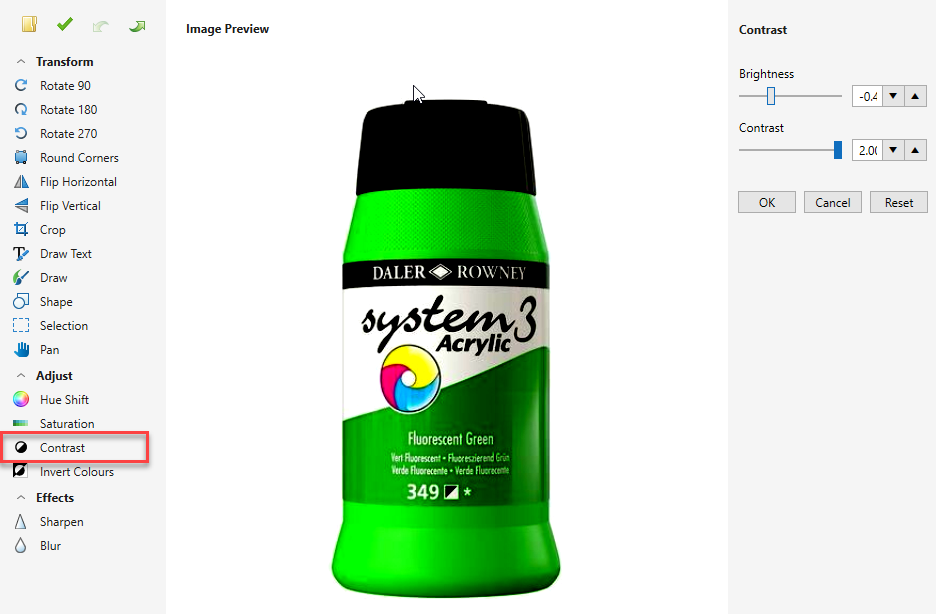
To change the brightness of the image move the Brightness slider as desired.
The contrast can be adjusted with the Contrast slider.
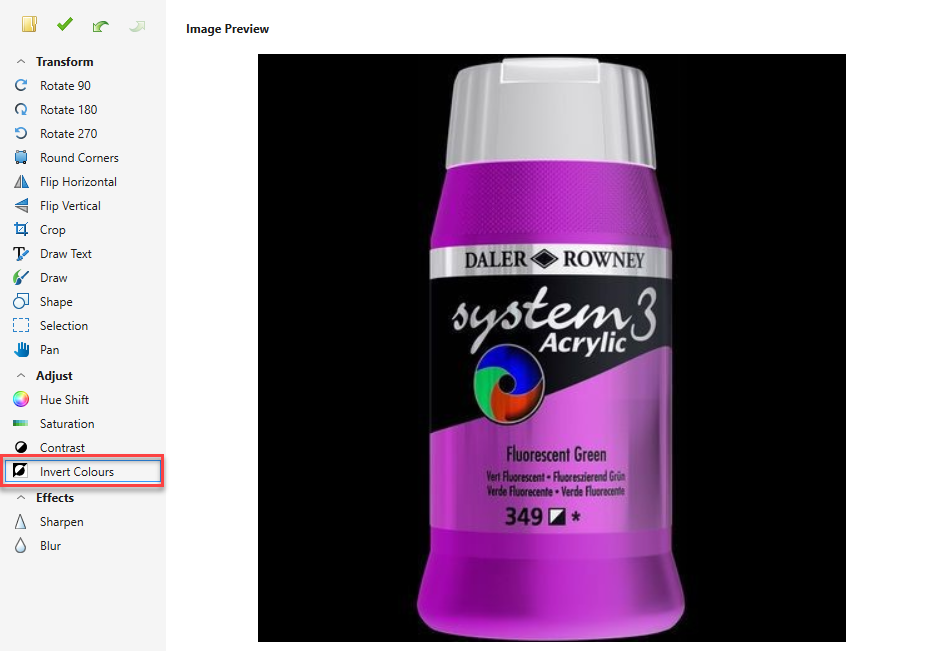
Invert Colours Tool
The Invert Colours tool allows you to invert the colours of the image.
Sharpen Tool
The Sharpen tool allows you to sharpen the image.
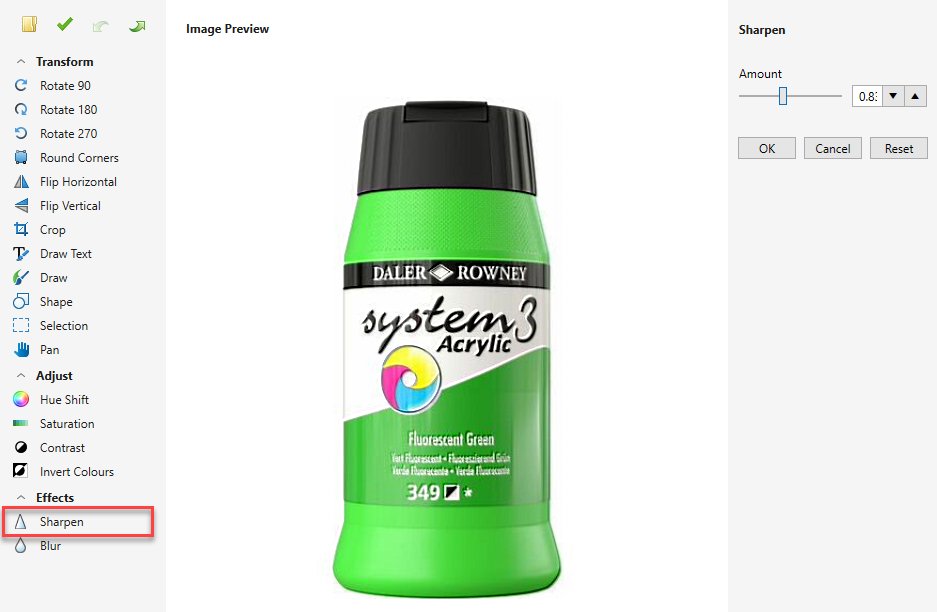
The higher the sharpen amount, the more of the sharpening affect will be applied.
With this tool less is usually more, it is easy to overdo the effect and make the image look un-natural.
Blur Tool
The Blur tool allows you to blur the image.
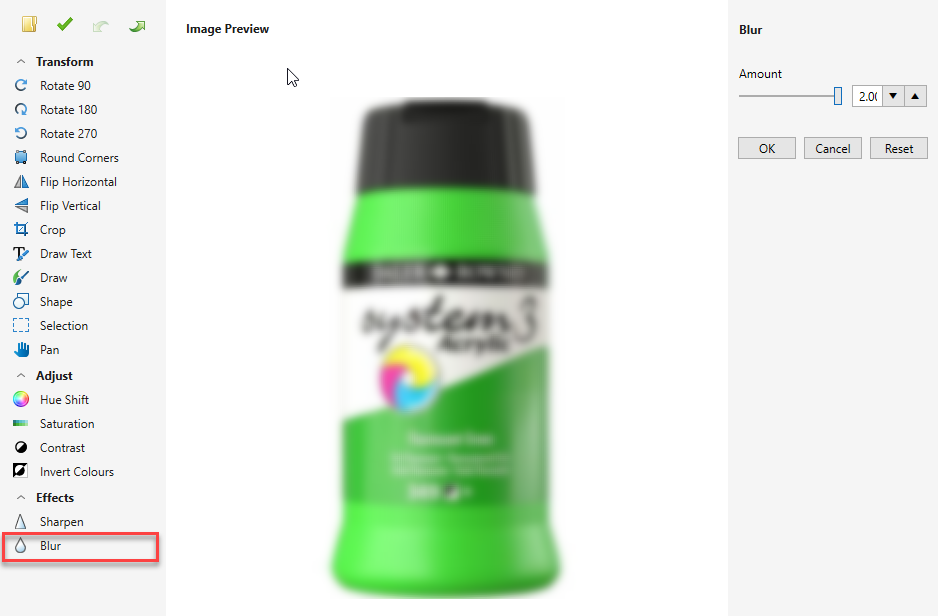
The higher the blur amount, the more of the blurring affect will be applied.
This tool can be useful if used in the selection tool as it can be used to blur part of an image.
